PRODUCT LOACTCR
Category
Series
Material
Light source


LED light source, green and energy saving;
IP65, waterproof;;
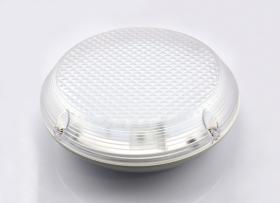
Die-cast aluminum body and PC prismatic diffuser;
3 Hours emergency(customized);
Microwave sensor;
--Automatic dims when detected area is unattended
--Adjustable range (1-8m)
c/w M20 x 1.5 IP65 Gland

Anti-glare design: against from the dizzy light; No UV, no infrared, no other Hazardous Substances;
No noise, no flicker, resistance from vibration ;CE&ROHS compliant;.
Two years warranty;.
Input: AC100-240V 50/60Hz
PF>0.9
LED Driver Output: DC 30V
LED Driver output current: 550mA±25mA
Conversion Efficiency>85%
Beam angle: 120°
Color Rendering Index: CRI>75Ra
Luminous Efficacy: 82Lm/W for Sensor version
67.5Lm/W for Emergency version 65Lm/W for Sensor+ Emergency Version
Mechanical Characteristics:
Working temperature: 55 degrees Celsius at room temperature 25 degree Celsius
Ambient temperature: -20~50 degrees Celsius
|
Input voltage ( 50/60Hz) |
AC 100-240V |
|
Power consumption |
20 W |
|
Power factor(PF) |
>0.9 |
|
LED Driver output voltage |
DC 30V |
|
LED Driver output current |
550mA ±25mA |
|
Light source |
Epistar 2835 SMD LED |
|
Color Temperature |
3000K /4000K 6000K (optional) |
|
CRI |
>75 |
|
Flux luminous |
1800- 2000Lm |
|
Luminous efficacy |
105Lm /W for SS-OYL-395mm-SMD2835-248P-23W-C 100Lm /W for SS-OYL-395mm-SMD2835-248P-23W-S 100Lm W for SS-OYL-395mm-SMD2835-248P-23W-E 95Lm /W for SS-OYL-395mm-SMD2835-248P-23W-Es |
|
View angle |
95.8° |
|
Housing material |
Die-cast aluminum base, PC prismatic diffuser |
|
IP Rating |
IP 65 |
|
Life Span |
Up to 35, 000 hours |
|
Operation temperature |
-10degC to 40degC |
|
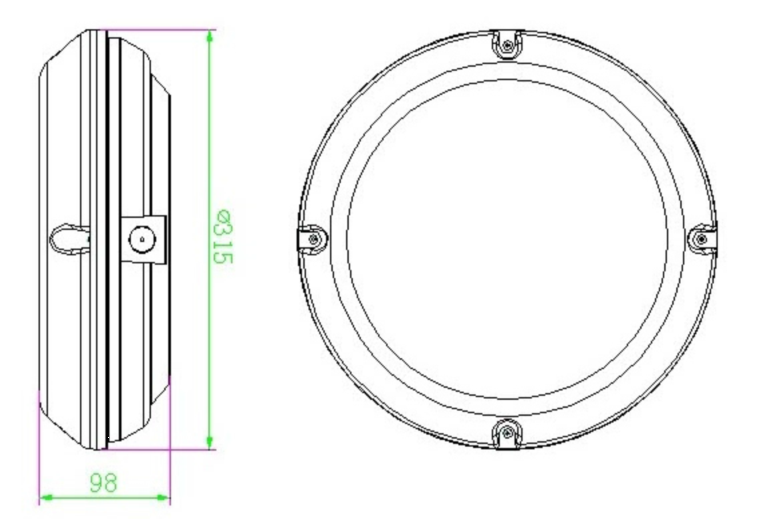
Dimension |
¢315 *98mm |
|
Package |
330*330*110mm |
|
Net Weight |
3.8KG(approx) |
|
Emergency: |
|
|
Type |
Maintained |
|
Battery(High-Temperature) |
9.6V 3.2AH Ni-MH rechargeable |
|
Emergency output |
30% nominal power |
|
Emergency duration |
>3 Hours |
|
Charge time |
< 12Hours |
|
LED indication |
Red: charging; Green: fully charged; Yellow: battery fault or disconnected |
|
Test button |
AC power on: Push and hold the button to enter emergency mode; release button to come back AC power mode |
|
Microwave Sensor: |
|
|
Sensor range |
180 degree; 0.5 - 8M(adjustable) |
|
Sensing interval |
10s to 5min max (adjustable) |
|
Sensing interval output |
25% nominal power |
| Model | LED (Pcs) | Wattage (W) | Colour | Lumens (Lm) | Size (mm) |
Beam Angle(°) |
Input Voltage(V) |
Waterpriif (IP) | Download |
| SS-OYL-395,98mm-SMD2835-248P-23W-C | 248P | 20W | 3000K,4000K,6000K | 1800Lm | 395mm*98mm | 96° | 100-240V AC | IP65 |  |
| SS-OYL-395,98mm-SMD2835-248P-23W-S | 248P | 20W | 3000K,4000K,6000K | 1800Lm | 395mm*98mm | 96° | 100-240V AC | IP65 | |
| SS-OYL-395,98mm-SMD2835-248P-23W-E | 248P | 20W | 3000K,4000K,6000K | 1800Lm | 395mm*98mm | 96° | 100-240V AC | IP65 | |
| SS-OYL-395,98mm-SMD2835-248P-23W-ES | 248P | 20W | 3000K,4000K,6000K | 1800Lm | 395mm*98mm | 96° | 100-240V AC | IP65 | |
These instructions should be read in full and retained after
Installation for future reference.
SAFETY
• It is recommended that this luminaire is installed by a
qualified electrician and installed to the current edition of the
IEE wiring regulations.
•Before installation or maintenance is carried out, ensure
that the mains supply is turned off, and adequately isolated.
•Check the total load of this and any other luminaires
on the same circuit does not exceed that of the fuse or main 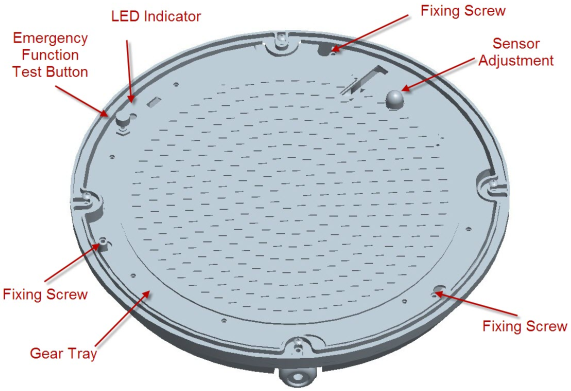
circuit breaker. Fig 1
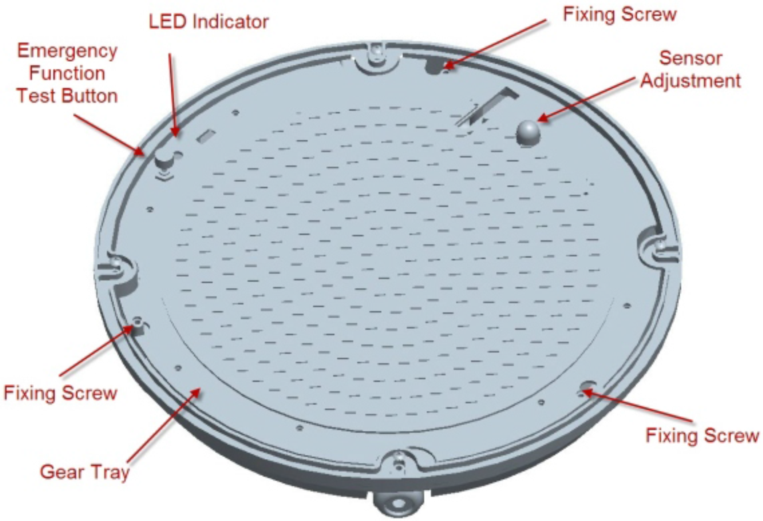
FIXING INSTRUCTIONS
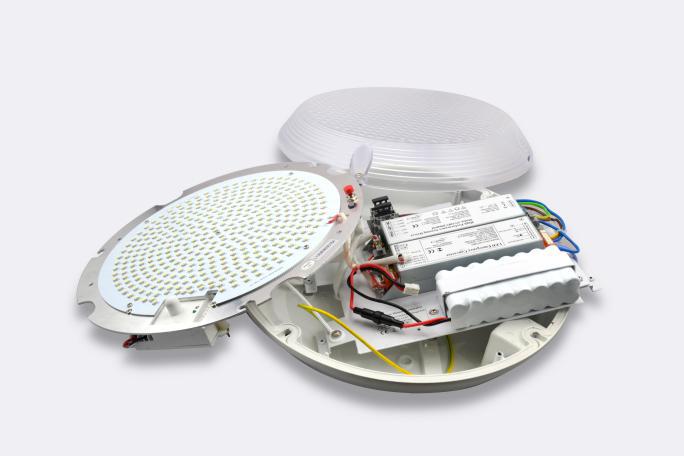
• Remove the diffuser from the base by unscrewing the 4
retaining screws and lifting away.
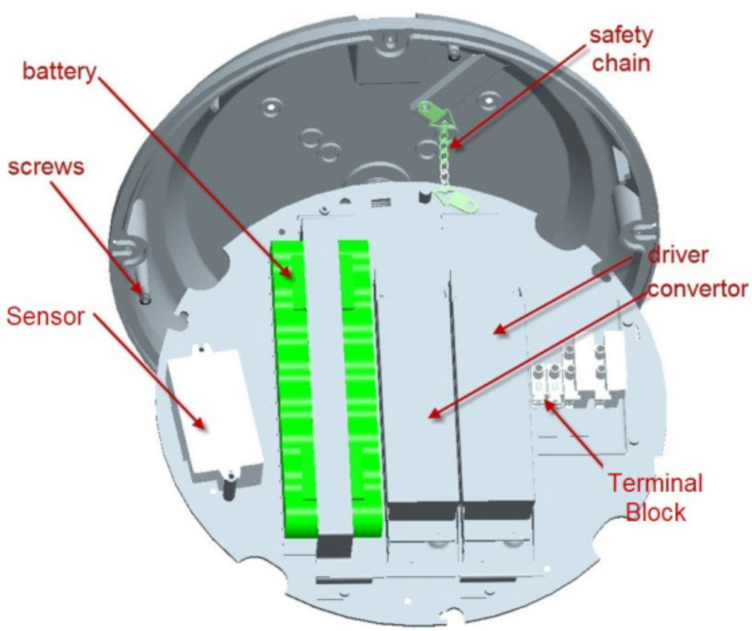
• Unscrew the 3 fixing screws (see Fig 1) to remove the LED
gear tray and gain access to the terminal block. A safety chain is
provided to prevent the gear tray from falling during installation. 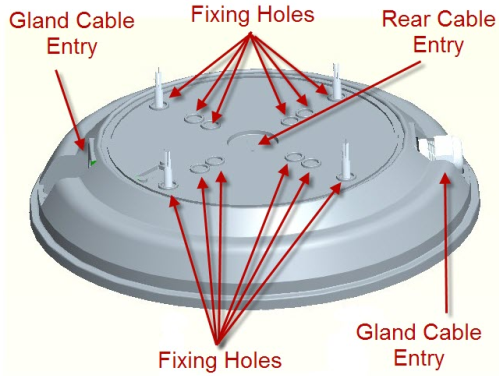
• Drill through 4 of the 12 fixing hole positions) on the back of
the base and side cable entry(see Fig 2). Fig2
Then mark the position of the luminaire to the fitting surface. Make
sure the fitting surface can bear the weight of the luminaire. Drill
the marked holes and fit suitable wall/surface plugs.
• Feed the power supply cable through the gland and cable entry.
• Connect the cable to the terminal block as follows:
•For the SS-OYL-395mm-248P-23W-SMD versions(see Fig.3):
LIVE wire (Red or Brown) to the terminal marked L 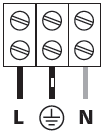
![]() NEUTRAL wire (Black or Blue) to the terminal marked N
NEUTRAL wire (Black or Blue) to the terminal marked N
EARTH wire(Green/Yellow) to the terminal marked Fig3
\
• For the SS-OYL-395mm-248P-23W-SMD emergency versions(see Fig 4):
PERMANENT LIVE (Red or Brown) to the terminal marked PL 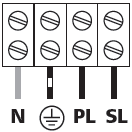
SWITCH LIVE (Red or Brown) to the terminal marked SL Fig 4
NEUTRAL (Black or Blue) to the terminal marked N
EARTH (Green/Yellow) to the terminal marked ![]()
( Note: If there are only 3 lead wires from the main supply,
please short PL and SL, and then connect Live Wire to PL or SL.)
• Ensure that there are no exposed conductors, loose or trapped cable strands and re-fit the gear tray.
• Refit the diffuser by screwing in place.
• Now the luminaire is ready for use.
EMERGENCY VERSION ONLY
•Emergency function test button, (see Fig 1) after installation with the mains supply on, push the test button to test the emergency function, if the LED brightness is reduced to emergency brightness (30% of full brightness), the function is working.
• LED Indication:
Red indicates the battery is charging
Green indicates the battery is fully charged
Yellow indicates the battery is disconnected or damaged
Microwave sensor instructions
The sensor is an active motion detector, it emits
high-frequency electro-magnetic waves (5.8GHz)
and receives their echo. The sensor detects the
change in echo from the slightest movement in its
detection zone. A microprocessor then triggers
the “switch light ON” command. Detection is
possible through doors, panes of glass or thin
walls.
Important: persons or objects moving
towards the sensor are detected best!
Reach setting (sensitivity)
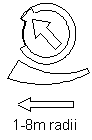 Reach is the term used to describe the radius of the circular detection zone produced on the ground.
After mounting the sensor light at a height of 2.5m, turn the reach control completely in anti-clockwise
direction to select minimum reach
(approx.1 m radius), and turn the reach control completely in a clockwise direction to select the maximum reach (approx.8m radius).
The LED indicator will flash when the reach control is rotated.It flashes 1 to 10 times, representing 1m to 8m for the radius of the detection zone.
NOTE: The above detection distance is measured using a person who is between 1.6m~1.7m tall with an average build, moving at a speed of 1.0~1.5m/sec. if any of these variables are changed, the detection distance will also resultantly change.
SENSOR TECHNICAL SPECIFICATIONS
Input Voltage:12V DC
Output Voltage:5V DC
Sensor principle:Microwave motion detector
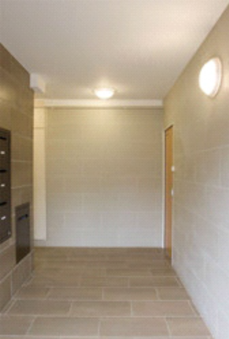
Installation:Indoors,Ceiling mounting
HF system:5.8GHz+/-75MHz CW radar,ISM band
Transmission power:<10mW
Detection angle:360°
Detection range:up to 8m(on 100% sensitivity,frontal to the sensor,plain sensor without glass)
Motion detection:0.3…3m/s(1…10km/h)
Time setting: 10seconds to 5 minutes
Light control: 2-2000 LUX
Power consumption:Approximately 0.9W
Operating conditions:Operating temperature,-10°to 70℃
IP rating:IP 20(mounting inside a fitting)

Time setting
The light can be set to stay ON for any period of time between approx. 10sec (dial turned fully anti-clockwise ) and a maximum of 5min(dial turned fully clockwise). Any movement detected during the “on” time will reset the timer. The LED indicator will flash when adjusting the time setting dial. The number of flashes means the following:
1flash = 10sec, 2 flashes= 20sec, 3 flashes= 30sec,
4 flashes= 45sec, 5 flashes=60sec, 6 flashes=90sec,
7 flashes=2min, 8 flashes=3min, 9 flashes=4min,
10 flashes=5min .
NOTE: After the light switches off, it takes approx. 1sec before it is able to start detecting movement again. The light will only switch on in response to movement once this period has elapsed.
Light-control setting
 The chosen light response threshold can be infinitely from approx. 2-2000lux. Turn it fully anti-clockwise to select dusk- to-dawn operation at about 2 Lux. Turn it fully clockwise to select daylight operation at about 2000lux. The knob must be turned fully clockwise when adjusting the detection zone and performing the walk test in daylight.
Note: This setting has not been used!
Troubleshooting:
|
Malfunction |
Possible Cause |
Remedy |
|
The luminaire will not work |
Wrong light-control setting selected |
Adjust setting |
|
Luminaire faulty |
Change luminaire |
|
|
Mains switch OFF |
Switch ON |
|
|
The luminaire is always ON |
Continuous movement in the detection zone |
Check zone setting |
|
The luminaire works without any identifiable movement |
The sensor not properly mounted for detecting movement reliably |
Securely mount sensor enclosure and luminaire |
|
Movement occurred, but not identified by the sensor (movement over boundary wall, movement of a small object in immediate luminaire vicinity etc.) |
Check zone setting |
|
|
The luminaire will not work despite movement |
Rapid movements are suppressed to minimize false triggering o r the detection zone you have set is too small |
Check zone setting |


联系我们-利博公司客服电话 199-9598-9992(开户 上下分)


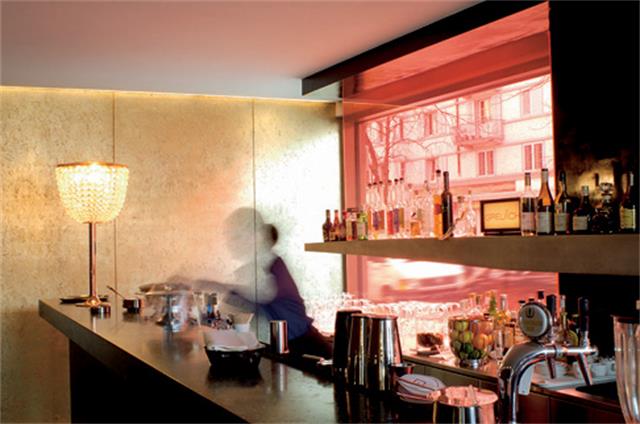 Greulich Hotel
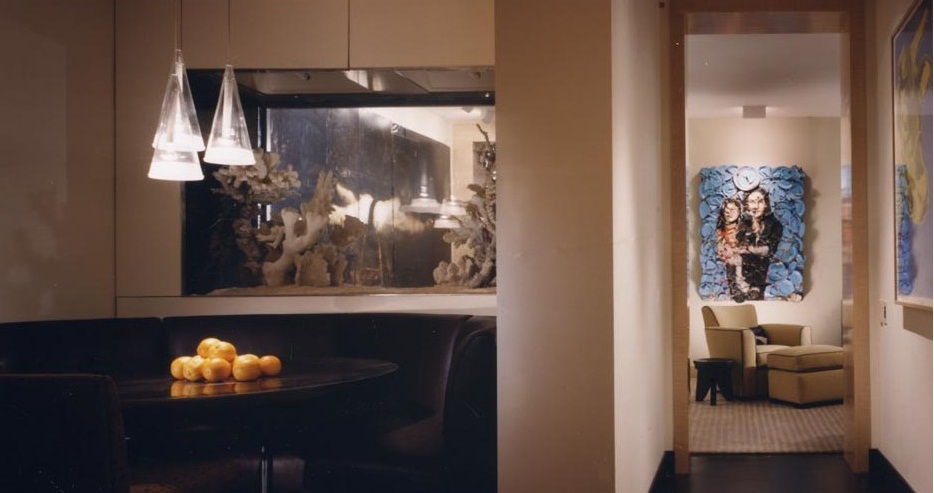 Home
Home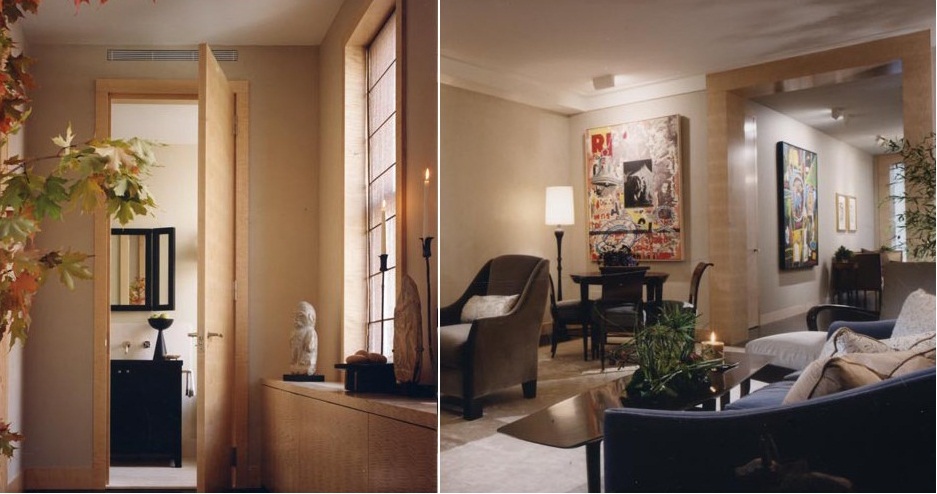 Home
Home ICL-OYL-283,79mm-SMD3528-240P-12W-S,MS,EM,EMMS-IP65
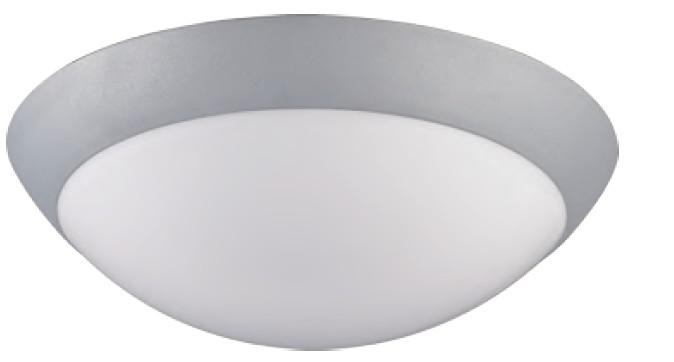 IC-OYL-300mm,400mm-10W,20W-1
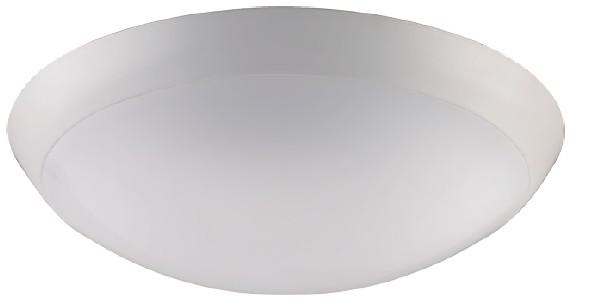 IC-OYL-300mm,400mm-10W,20W